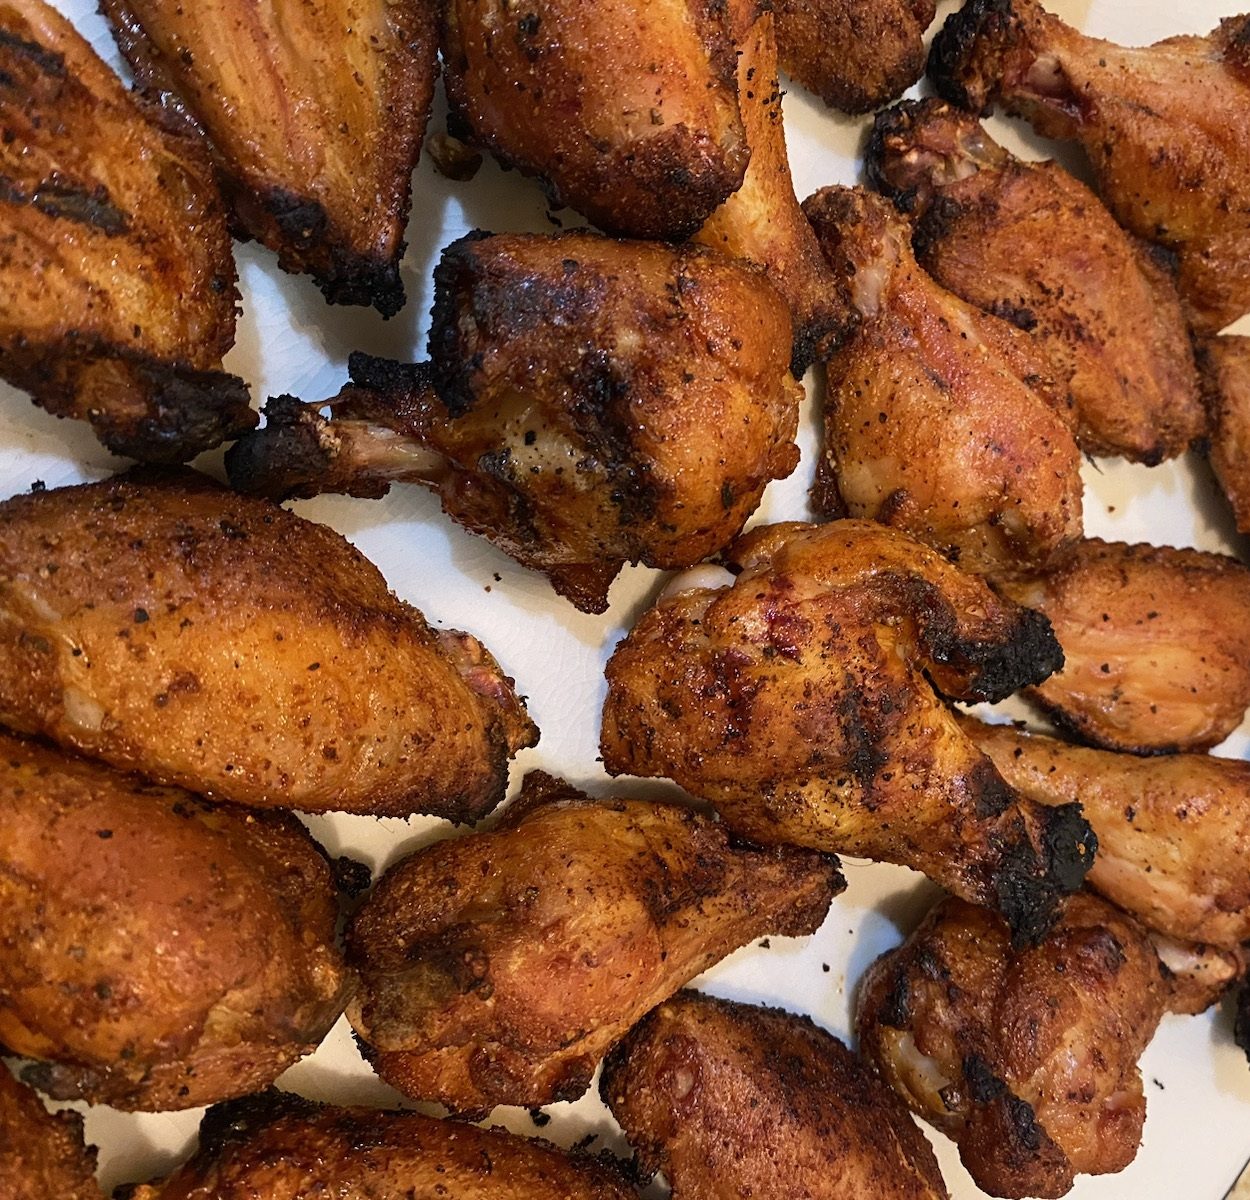
Easy, right? Arrange the coals evenly and light them up. When they are hot, put on some thawed chicken wings. NO. STOP. WRONG! Everything about that is wrong!
I recently attended my first tailgate. Spring classic football game at the large high school my twin sons will eventually attend. We heard there was a vibrant tailgate scene so we got there early and started walking around.
After a few minutes of seeing everyone’s tailgate setup, I got that face.
That face.
My wife calls it my, “Evan is looking at food and his face is melting like he is looking into the ark from Raiders of the Lost Ark” face.
My sons asked, “dad, what’s wrong?”
“Nothing,” I lied, “just try some food.”
My teenage sons obliged, sampling food from a few truck bed grills. They came back; I asked them how it was. Then my one son said the magic words.
“It was good. But why is your barbecue so much better?”
I replied, “because everyone here is doing grilling totally wrong.”
It was then and there I decided to write this article, a guide to grilling the perfect tailgate chicken wing. I am sure your barbecue is great, everyone thinks theirs is, just like everyone thinks they are funny. But if you want people to go, “damn, you got the grill skills to pay some ill bills,” take note:
How to Grill the Perfect Tailgate Chicken Wing
Step 1: Let the Right Wing in
This could have been titled, “don’t let the wrong wing in,” but then it would have not been a play on words about one of the best vampire movies of all time. I digress, so let me get back on track: Don’t buy frozen chicken wings.
According to Wingmaster Wing and Sauce Shop (and also according to a bunch of pitmasters, myself included), “the freezing process affects the quality of the meat. Freezing can cause the bones to crack and the hue of the chicken to turn gray. The texture could also be a bit off, partly because their connective tissue hasn’t been sufficiently broken down. This results in a “rubbery” quality that you can avoid if you simply opt for fresh.”
Put simply, freezing meat changes its composition in unpredictable ways. Always go with wings that are in the cooler, not the freezer. Now, I’m not saying you have to source artisinal, free-range, expensive hoity toity wings. Heck, the wings I’m using for these pictures I got from Wal-Mart’s cooler for $2.50 a pound. Just never, ever frozen. Let it go.
I suspect another reason people buy frozen chicken wings is that they come pre-sliced into drums and flats. At my Wal-Mart, the cooler chicken wings only come whole and I have to slice them at home. But guess what? I also bought poultry shears for $1.98, also at the Wal-Mart. I’m not endorsing Wal-Mart, at all, they suck as a “corporation person” or whatever. But I have twin teenage sons who eat approximately 650 pounds of food, every day, and I gotta have some scrill left over to pay my mortgage.
Step 2: Blister the Skin Ahead of Time
Y’ever wonder why sometimes wings have that huge crunch, while other wings are limp and rubbery? Blistering the skin is the difference.
The crispy crunch comes from carbon dioxide gas being released during the cooking process. This gas forms tiny bubbles beneath the skin, which expand and puff up to create that appealing brown crunch.
To accelerate this process, two things are key: Baking powder to elevate the pH and salt to absorb moisture. It’s the same process that happens with deep frying, only using chemistry instead.
So, for the perfect tailgate grilled chicken wing, you have to dry brine them ahead of time. Here is my recipe:’
Perfect Tailgate Chicken Wing Dry Brine
- 1/2 tsp Kosher Salt
- 1/4 tsp aluminum-free baking powder
- 1/4 tsp freshly ground black pepper
- 1/4 tsp granulated garlic
- 1/4 tsp onion powder
- 1/8 tsp smoked paprika
- 1/8 tsp chipotle chili powder
A. Unpack the wings. Dry them as much as you can with paper towels. Slice up the drums and flats and tips. Use the tips for stock if you are a soupmaker. I just throw them away, because I am not a fan of soup. Every time I consume soup, my stomach tells my brain, “what is this? Is it an entree or a drink? Pick a damn lane.” That makes my brain hurt.
B. Working with six wings at a time (3 drums, 3 flats), toss them in this brine. The recipe for this dry brine was adapted from an article on AmazingRibs.com. If you are not familiar with AmazingRibs.com or Meathead Goldwyn, then, dang. Just dang. He is the GOAT and his site is the GOAT and if you want to approach anything beyond noob grillmaster, you need to study his way of the blade.
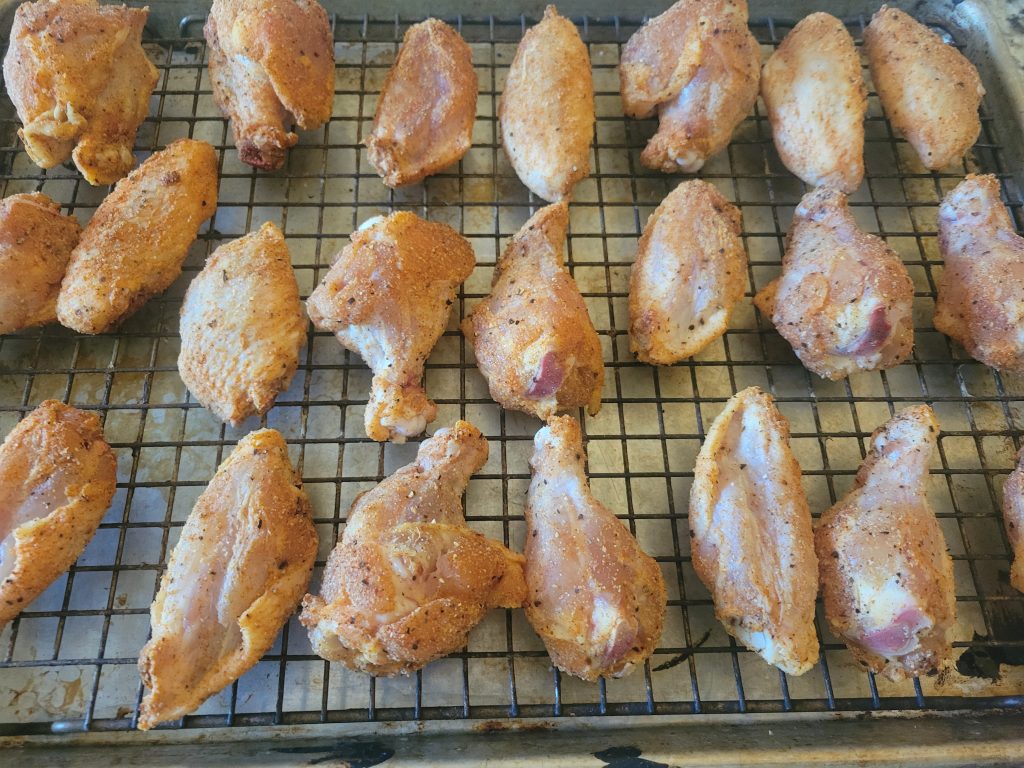
Toss those ingredients into a large bowl then shake the bowl around until they are evenly mixed. Throw 6 wings in there and toss until all of the brine has been absorbed. Transfer the wings to a wire rack sitting on a baking sheet. Wipe the tossing bowl to dry it, then repeat until all wings are coated.
Here’s what mine looked like after applying the brine:
What’s that?
You don’t have a wire rack that fits snugly into a baking sheet? But, how are you making bacon?
What’s that? Frying pan?? YOU ARE DOING IT WRONG! Seriously, they are $7 on Amazon and take all of the guesswork out of making perfectly even-cooked bacon. Oh, also, I make my own bacon using pork bellies I get at Costco. Another shout out to Meathead Goldwyn is due, here.
Step 3: Refrigerate the Wings for 24 Hours
Put the baking sheet with the rack of chicken in the fridge and don’t touch it for a day. Don’t cover it, either, the air needs to circulate in order for the blistering effect to happen. Don’t worry, it is safe: This isn’t raw chicken we are dealing with, anymore, it’s been sufficiently salted.
During the pandemic, I needed new hobbies, as all of my old hobbies involved actually being in contact with other people. I decided my main new jam was going to be studying meat science. For one of my projects, I teamed up with a bunch of other amateur dad cooks from SomethingAwful.com to meet the goal of achieving an air-fryer chicken wing with the perfect crunch. Eventually, one of us discovered the “fridge it for hours and hours to maximize blistering” technique and it was an absolute game changer. Soon after, all of us were cranking out air-fried wings with double the crunchiness of even the top wing restaurant chains. Don’t neglect the blistering effect.
Here are those wings after 24 hours of refrigerated dry brining:
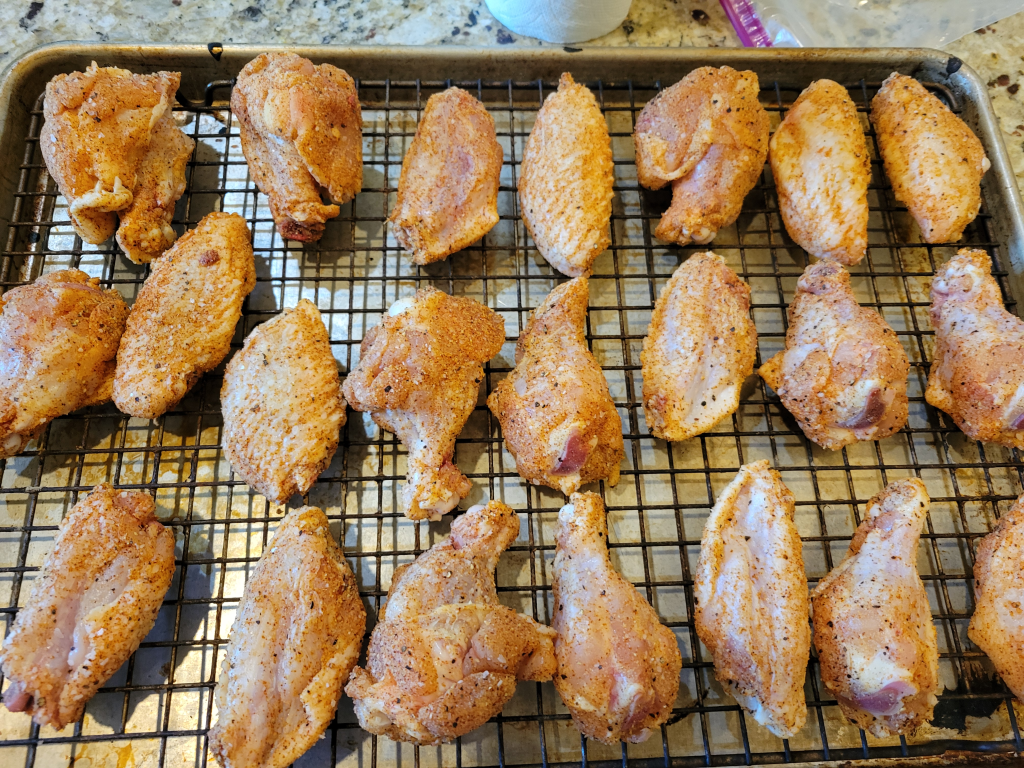
Notice the skin is drier and starting to shrivel and brown.
Step 4: Preheat Your Coals
Use a coal chimney. Googling around, I see articles about coal chimneys that generally list the same advantages. Namely: Faster ignition, even heat distribution, and no need for chemicals. But there’s another reason, one I consider the best reason to use a chimney: Reliable temperature. Coal isn’t a uniform substance: It’s basically just burnt wood that’s all smashed together. So, I have found that when I just dump it in my grill and light it, the temperature fluctuates wildly. Whereas, when I dump my chimney, it’s always about 500-550 degrees Fahrenheit.
Step 5: Use a Two-Zone Grilling Method
This is what melted my face after walking around the tailgaters. If you aren’t using a two-zone grilling method, you aren’t grilling in my melting eyes. You put the hot coals in one section of the grill and leave the other section empty. Then you slow-cook the meat in the empty zone until it is almost ready, and finish it with a sear over the hot section.
Everyone at the tailgate was just spreading the coals out evenly and cooking their proteins on this one-zone setup. Look, the outside of meat cooks faster than the inside. That’s why we baste the outside of Thanksgiving turkeys, to cool the outside down. That’s why, when we go outside on a hot day, we feel the heat on our skin first. If you are spreading coals evenly, you are not cooking your meats evenly.
One small issue I have with two-zone cooking is that the meats I put closer to the coal side cook a little faster than the meats that are furthest away. With entrees like burgers or steaks, this isn’t a problem, I just switch the meats closest with the meats furthest halfway through the slow cook. But when I am cooking dozens of chicken wings, this rotation is quite a chore. However, I recently discovered the Vortex Method. Check it out:
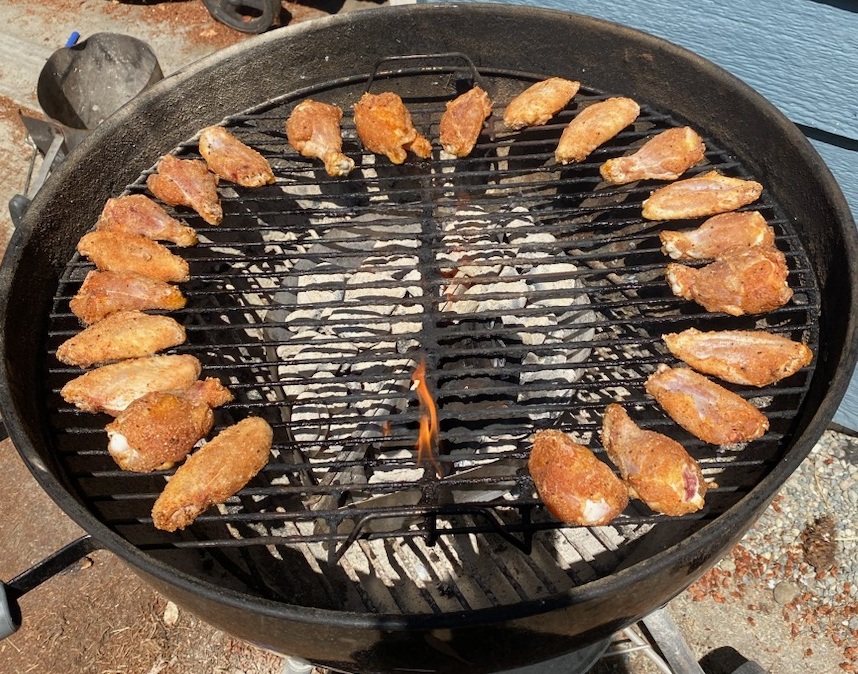
They make fancy products for keeping coals in the center. They cost $30-$40 on Amazon. However, I find that I can just dump the chimney in the middle of my grill, rake any wayward coals back into the pile, and everything works out fine. In my picture, you will see that I actually use a similar product to a Vortex. This is only because I already have these metal grates for slow-smoking a whole turkey on the grill, but it is absolutely not necessary. I also tossed a chunk of apple wood on there. I recommend apple or cherry.
Step 6: Slow Cook the Wings
You’ll want to arrange the wings in a circle (as shown above) in the low-heat zone. Do this for 20-25 minutes. You won’t need to turn them or anything, as indirect heat is cooking them. Go mow the lawn or something.
Step 7: Sear the Wings
After the slow cook time is up, move the wings directly over the coals. I see most recipes just say, “move all the wings,” and I have no idea how anyone does this. I have to turn the wings every 30-60 seconds to make sure they brown but don’t burn, and I can only manage about 6-10 at a time.
Honestly, you can sometimes skip this step if the wings are fully brown and sizzling crispy. I skipped it for the wings shown in the cover photo, here.
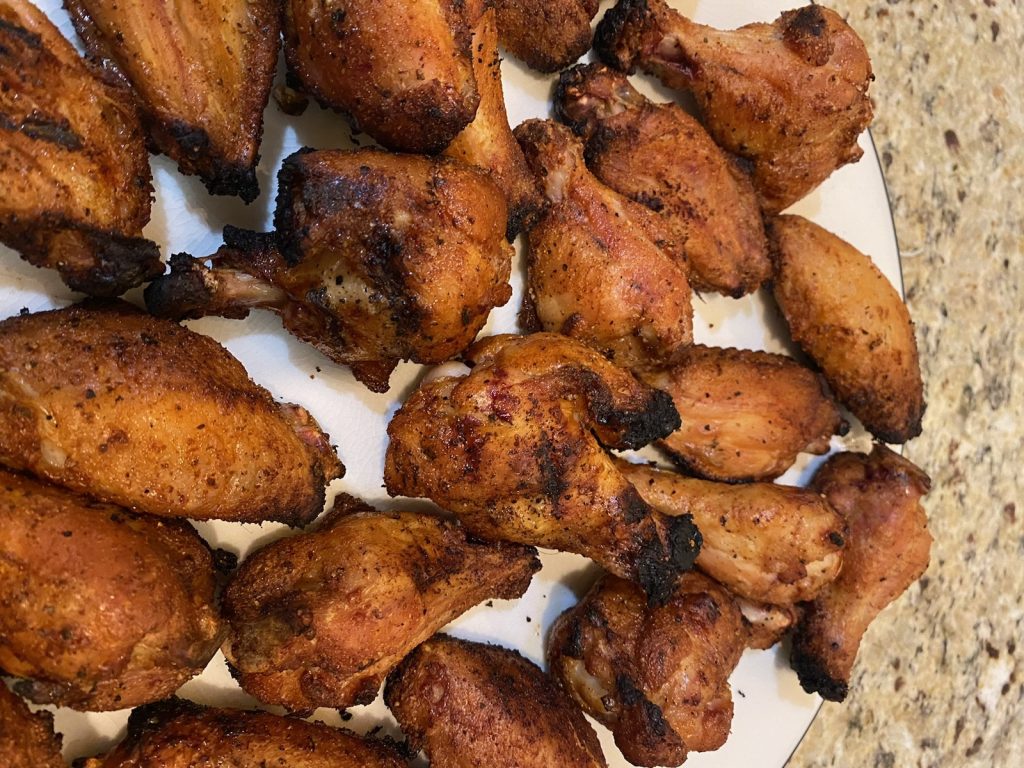
I also see most recipes say to pull the wings when they are between 165-175 degrees Fahrenheit. Again, I have no idea how or why anyone would do this. A digital thermometer will give wildly different readings for a drum vs. a flat, as the meat on the drum is much thicker. I’m not about to insert digital probes into both a drum and a flat every 6 wings. I did it once, just to make sure for safety, and all the wings were 175-180. Today, I just pull them when they have crispy skin and even browning. You know, when they look super appetizing.
Step 8: Do Not Sauce the Wings
Never serve these grilled wings with sauce already brushed on, for two important reasons.
A. Because I am not crisping all the wings at once, some will sit out slightly longer than others. The longer a wing is sauced, the more the crispiness dissolves.
B. The most important reason: When someone bites into your unsauced wing and realizes it is still amazingly delicious, they rightfully see you as a grill god.
I do serve them with sauces (and blue cheese dressing). But I put the sauces out in separate dishes with basting brushes. That way, the guests can sauce each wing right before they bite into it, maximizing the crispiness. Also, if you do not already have one, get a silicone basting brush.
Silicone basting brush = game changer. Full stop.
You never need to wash it. Sauces don’t stick to silicone. So, after using it, you just have to rinse it off and set it out to dry. Another advantage is that I don’t need a brush for each sauce. I just set out a cup of water for guests to swirl the brush around in before trying a different sauce.
I hope that this article has upped your grilling game to “Evan-approved bare minimum for a tailgate.” If you want to talk game day recipes, or fantasy football (this is, after all, primarily a fantasy football website), hit us up on our Discord. But, be cool and excellent to each other.
Full Perfect Tailgate Chicken Wing Recipe
Ingredients:
-
- 3 lbs fresh (not frozen) Chicken Wings
- 2 tsp Coarse Kosher Salt
- 1 tsp aluminum-free baking powder
- 1 tsp freshly ground black pepper
- 1 tsp granulated garlic
- 1 tsp onion powder
- 1/2 tsp bourbon-smoked paprika
- 1/2 tsp chipotle chili powder
Steps:
- Pat wings dry with paper towels. Separate them into drums and flats
- Toss wings, 6 at a time, in dry brine until the brine is completely absorbed
- Refrigerate brined wings, uncovered, for 24 hours
- Start coals in chimney. When ready, pour them in a circular pile in the middle of the grill, so the outer ring of the grill area is coal-free
- Place chicken wings on outside area of the grill, away from coals
- Optional: Toss a chunk of cherry or applewood onto the coals
- Cover and cook for 20-25 minutes
- Working in batches, move wings onto hot section, above coals. Turn every 30-60 seconds until crispy and brown
- Serve with sauces and blue cheese dressing on the side. Do not sauce wings before serving
